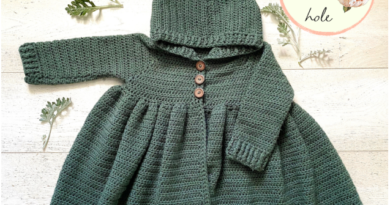
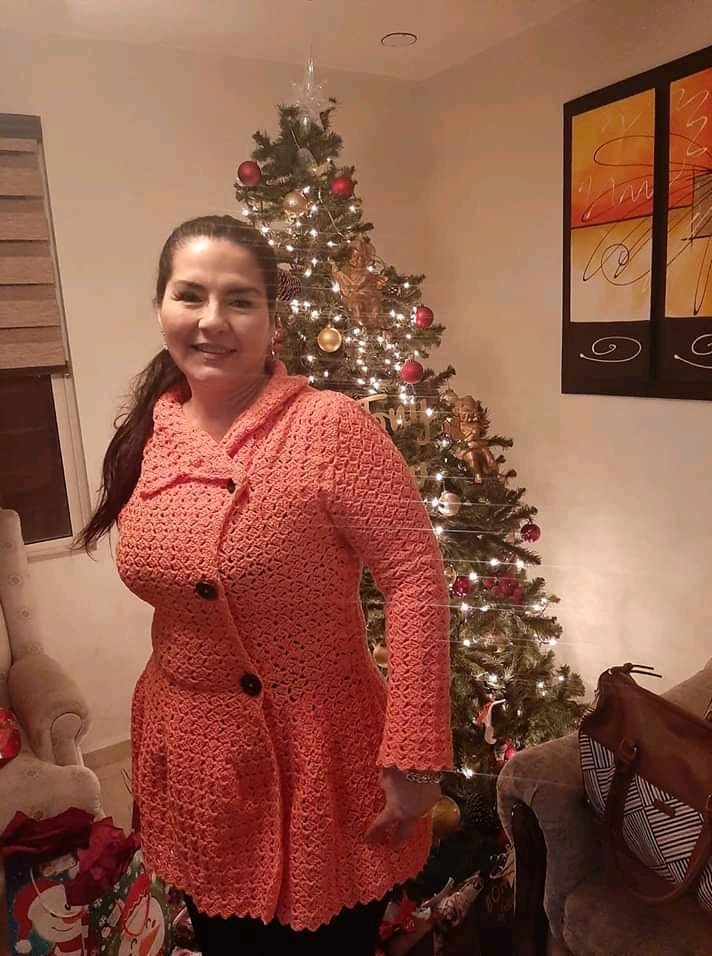
Crochet 2 Corner Blazers
Crochet 2 Corner Blazers is the kind of piece worth investing in because it is timeless and makes any look very elegant and stylish. The blazer never goes out of fashion no matter what time it is a wild piece that goes well year-round, which is great and helps a lot. It can replace a coat leaving the look perfect. It can be a lighter and lighter colored piece thus creating a mix of lengths helping to give it charm and movement.
The elongated blazer is a very versatile piece of men’s wardrobe and with it, you can make a serious look, but at the same time a modern touch that you will love. Following the recipe and with attention, you will be able to easily make this beautiful piece and thus have a new accessory that can be used in different occasions.
Practical and very quick to be made, this crochet blazer can be a perfect piece for anyone working in sales. Thank you for visiting our website. We always try to bring you the best. Beautiful model to make the perfect wardrobe for the coldest days when you always need a piece like this!!!
See Also:
➽ Thread Crochet Shawl Pattern
➽ Circle In Crochet Blanket
➽ Colorful Blanket
Crochet 2 Corner Blazers
Back Panel
- Ch 5, dc in 3rd ch from hook, dc in next 2 ch, turn
- Ch 5, dc in 3rd ch from hook, dc in next 2 ch, sl st in ch 2 sp, ch 2, 3 dc in same sp, turn
At the end of each row, you turn your work. While increasing to length and width measurement, you will ch 5 at the beginning of each row, dc in 3rd ch from hook, dc in next 2 ch, and then (sl st in ch 2 sp, ch 2, 3 dc in the same sp) in every ch 2 sp of the row. When you reach your length or width measurement (whichever is smaller), you stop increasing on that side. Instead of ch 5 at the beginning of the row, you will sl
st in the 1st and 2nd dc, and in the ch 2 sp where you start your brackets. When you reach your bigger measurement, you stop increasing on that side as well. You continue in the pattern until you have completed your final row with 1 3dc square and fasten off.
Front Panels (Make 2)
Follow the back panel instructions until you reach your desired width and stop increasing on one side. Continue increasing other side until you reach your desired length, and stop increasing on that side as well. When you reach your Measurement 5 number on this second side, you fasten off, leaving the rest of the rectangle unworked. This unworked part becomes your collar.
Attach your front panels to your back panel, sc across Measurement 5 of each of the front panels. Measure from the bottom of your length to your measurement 4 and place a stitch marker. Sc the front panels to your back panel from the bottom to your stitch marker.
Sleeves
The sleeves are crocheted onto the body of your cardigan. With the shoulder and side seams on the inside of your work, you will be starting your sleeves at the underarm part. You will be crocheting with a modified side lean stitch for the sleeves. Doing the side lean stitch for the sleeves allows for decreases in rows so that the sleeves are more
fitted vs having a one size sleeve from shoulder to wrist. The decrease row for the sleeve is row 6. I did 10 decrease rows over 30 rows total to get my sleeve shaped from my shoulder to my wrist. You want to make sure your decreasing is gradual…I find doing a decrease every 2 or 3 rows works. As you are doing your sleeves, you’ll want to write down what you did for each row so that you can duplicate it on your other sleeve. Rows 1 – 3 are setting the side lean pattern, and row 6 is the decrease row. This pattern is how I did my sleeves…yours may be different depending on your size.
With a multiple of 4, sc around the sleeve opening, sl st jn.
Ch 1 [(sc, ch 2, 3 dc) in next sc, sk next 3 sc] rep [ ] around, sc in last sc, sl st jn, TURN.
Sl st in next 2 dc, sl st in ch 2 sp, ch 2 (sl st, ch 2, 3dc) in each ch 2 sp around, sl st in 3rd dc from previous row, TURN.
Rep 3
Rep 3
(decrease row) sl st in next 2 dc, sl st in ch 2 sp, sl st in next ch 2 sp, ch 2, 3 dc in same ch 2 sp, (sl st, ch 2, 3dc) in remaining ch 2 sp around, sl st in 3rd dc from previous row, turn.
Rep 3
Rep 6
Rep 3
Rep 3
Rep 6
Rep 3
Rep 3
Rep 6
Rep 3
Rep 3
Rep 6
Rep 3
Rep 6
Rep 3
Rep 6
Rep 3
Rep 6
Rep 3
Rep 6
Rep 3
Rep 3
Rep 6
Rep 3
Rep 3, fasten off.
Collar
Attach yarn to 1st ch 2 sp of the right collar.
Ch 1, sc in same ch 2 sp (ch 3, sc in next ch 2 sp) rep ( ) across right collar to shoulder seam, ch 3 [dc in each dc, 2 dc in each ch 2 sp] across to left collar, ch 3, rep ( ) across left collar, turn.
Ch 2, dc in each sc and dc, 2 dc in each ch 3 sp around, turn.
Ch 2, dc2tog, fpdc in rest of dc across to last 2 st, dc2tog, turn.
Ch 2, dc2tog, bpdc in rest of dc across to last 2 st, dc2tog, turn.
Rep 3
Rep 4
Rep 3, fasten off
Trim
Attach yarn to bottom right of cardigan.
Ch 1, sc in each dc, 2 sc in each ch 2 sp, 3 sc in collar corners, across to bottom left, turn
Ch 1, sc in each sc, 3 sc in 2nd sc of collar corners, across to bottom right, turn.
Ch 1, sc in each sc, 3 sc in 2nd sc of collar corners, across to bottom left, fasten off.

Our Team’s Opinion About This Pattern
Crochet 2 Corner Blazers, the piece you need to keep you warm and to improve your look with style and charm in a way you’re gonna love!! Believe me, the design of this amazing piece will give you a really beautiful and stylish look that’ll leave you amazed, it will certainly be perfect for you, this will surely make your customers want one like it to use on their look, which will help you in sales!!
Want to make this amazing Crochet 2 Corner Blazers? So it’s simple, set aside all your material and tools before starting your piece so that you already have everything close at hand, so it will be easy to carry out this project, follow the tutorial carefully, make your piece while following the tutorial and I I am sure that you will be able to make this beautiful project easily.